Upper Cabinets
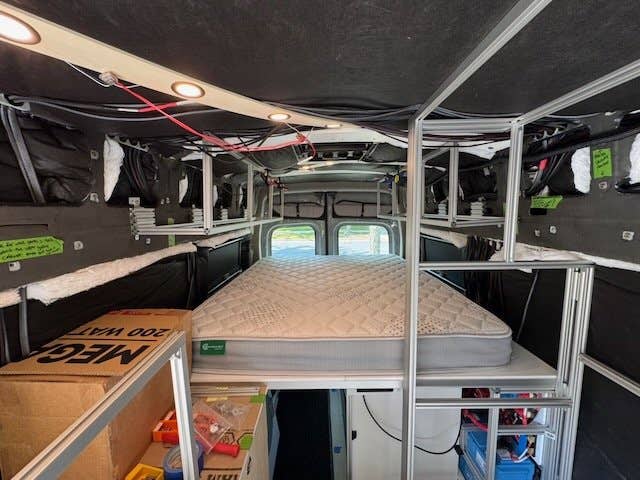
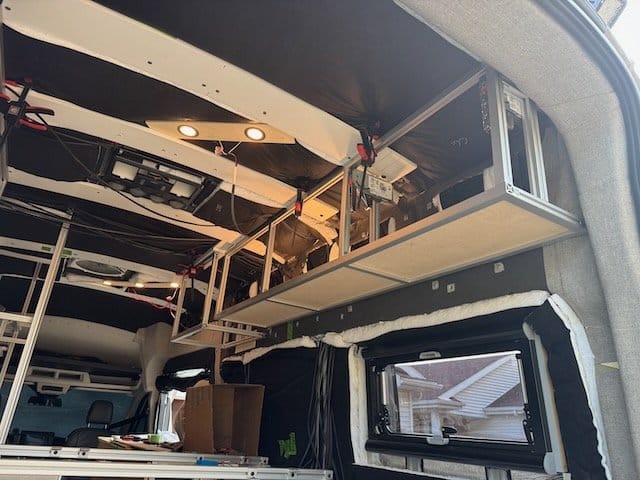
With north/south beds, we have room on each side above for 'reasonable' sized storage cabinets with less risk of forehead contusions. Before shot above with the just bare skeleton frame of the cabinets clamped up. Mostly followed the recipe from humble road and thrivans. Huge thanks to both of them. But adapting to a Transit vs. Sprinter required some creative 8020 and FR4 bushings.
We measured folded clothes and various packing cubes we liked to make sure the upper cabinets were well matched to our needs. Otherwise it's a complete gamble I guess.
Rear upper cabinets are mostly symmetrical, but we decided to make the driver side a bit shorter with about a 1 foot gap from the back of the shower wall. This gives us a perfect spot with some hooks to hang coats and such out of the way.
Ceiling plan has 16 puck lights - two rows of 6 - but when the upper cabinet doors are open, they will block the light so found a way in the 8020 build to run an LED strip along the upper edge which nicely illuminates every cabinet. Ran all of that back to a single switch for efficiency (all interior cabinets are lit or not, no need to micro optimize that).
Sourcing the white plastic panels of various thickness for the sides and curved back was a complete PITA. Wasted a few days optimizing that and figuring out how to have them cut it down to eliminate freight shipping nuttiness, yet still be usable sizes for my needs.
Panels are all 1/4" baltic birch with Rubio monocoat smoke color on all the inside surfaces and Wilsonart manitoba maple laminate and edge trim for all the exterior. Ikea Utrusta door hinges. Functionally they are awesome, but they are heavy. Couldn't trust any hinge alone to keep things from flying so southco slam latches are on every door - same as my entire kitchen galley lower cabinet. Note that you need to flip the latch 180 degrees for the upper cabinets and I initially thought that would feel really awkward trying to open the latch, but after a day it is no issue whatsoever - you don't even notice it.
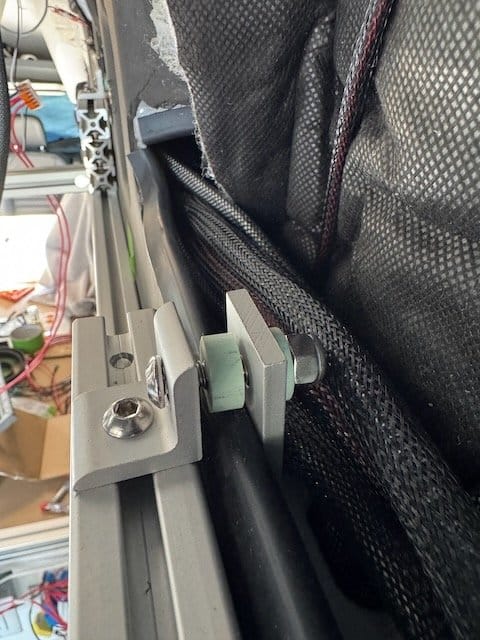
The Transit upper wall cavities are much higher than a Sprinter so you can see how I had to get creative 'stacking' 8020 pieces on that rear edge to reach up to the 'lip' of the cavity so I could secure against it.
At the top of that little stack there are two fasteners that pinch the wall and transfer most of the weight of the cabinet to the wall. The other fasteners are through bolted to the white 5/8" furring strips across the ceiling.
Flexible backs of cabinet pockets getting tuned and a little heat formed for relief.
Once the cabinet frame is mounted firmly to the van, you need some kind of 'handhold' to push in the back plastic panel and curve it around into place. So you can see in the shot below I added small access holes to fit a right angle pick into so that I could man handle the piece into place so it rested in the 8020 groove on the top and flush at the back.
Thivans cuts big finger holes in the top, but my tiny holes seem to work just as well and I prefer the look. It's super putzy and tricky trying to get each back panel and side panel to match tight so you don't end up with an ugly gap. Each cabinet area might have different interference behind it with various Ford umbilicals and such so every one of them is a custom tweak fest of fun.
I have some very thin VHB tape I'll put on the very lower edge to tack the back panels into place with zero gap for appearance. I haven't done that yet in any of these shots.
Member discussion