The Workbench
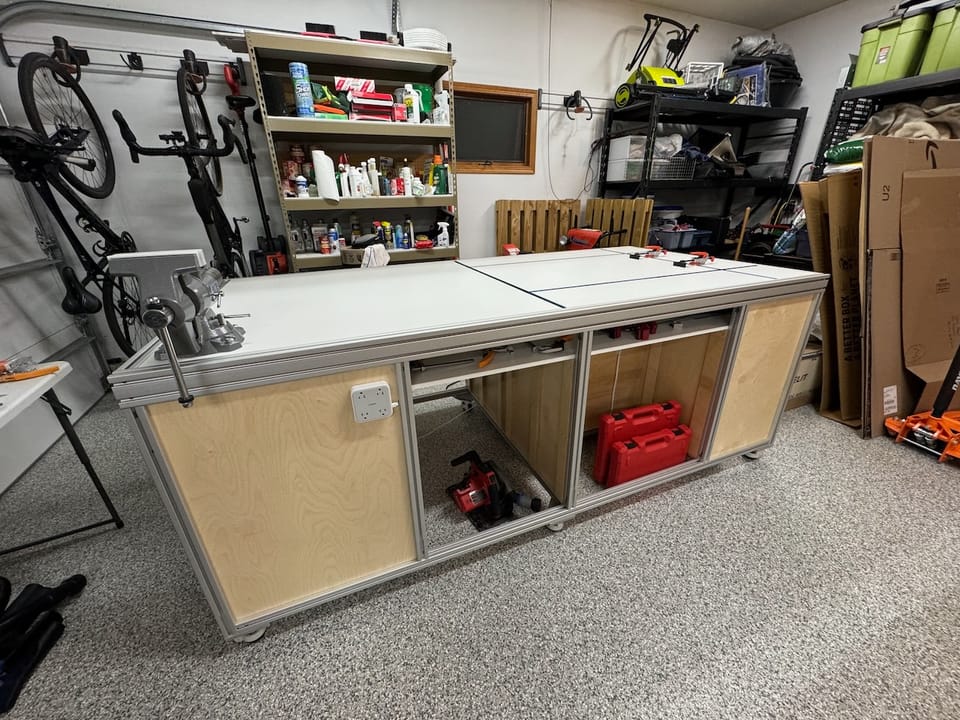
All of us dream of a killer, large workbench with a great vise, tons of clamping options, integrated electrical outlets, plenty of drawers and trays, and a little mobility for repositioning.
I've wanted one for 30 years, but never got around to building one or had a big enough project to really drive home the need. Until now.
It quickly became obvious that in order to build the van, I needed a good sized workbench in the garage. A day or two of spreading tools on a sketchy card table or two, all over the floor, and running up and down the stairs to the basement shop for every little item was enough to push me over the edge. And I wasn't even to cabinetry stage or anything very involved yet.
A few years ago I stumbled upon this design one night in a YouTube binge. I'd never really experienced extruded aluminum before and it seemed ideal for the task - perfectly straight, perfect 90 degree connections, super strong, even reusable to a future project if needs change dramatically. Then I realized it's slightly more expensive than 2x4s so shelved the idea at the time.
But the design came back to me. We're using extruded aluminum for all the primary 'modules' of the van (electrical cabinet, water cabinet, shower, kitchen galley). Gaining experience with it on a workbench build would be helpful.
And once the van build is complete, I don't need a giant workbench in my garage. I need to move it down to the basement shop which has plenty of room for it. But how to get it through doorways and down a flight of stairs?
All the canned designs for a big workbench were all lumber based and 'assemble once' with glue and framing. None designed to ever be taken apart and moved.
But the BF/MFT table out of extruded aluminum could be disassembled, moved, and then reassembled in a day or less.
So as much as I hated to take time away from making progress on the van, I basically took a month off and made a killer workbench out of 8020 extruded aluminum.
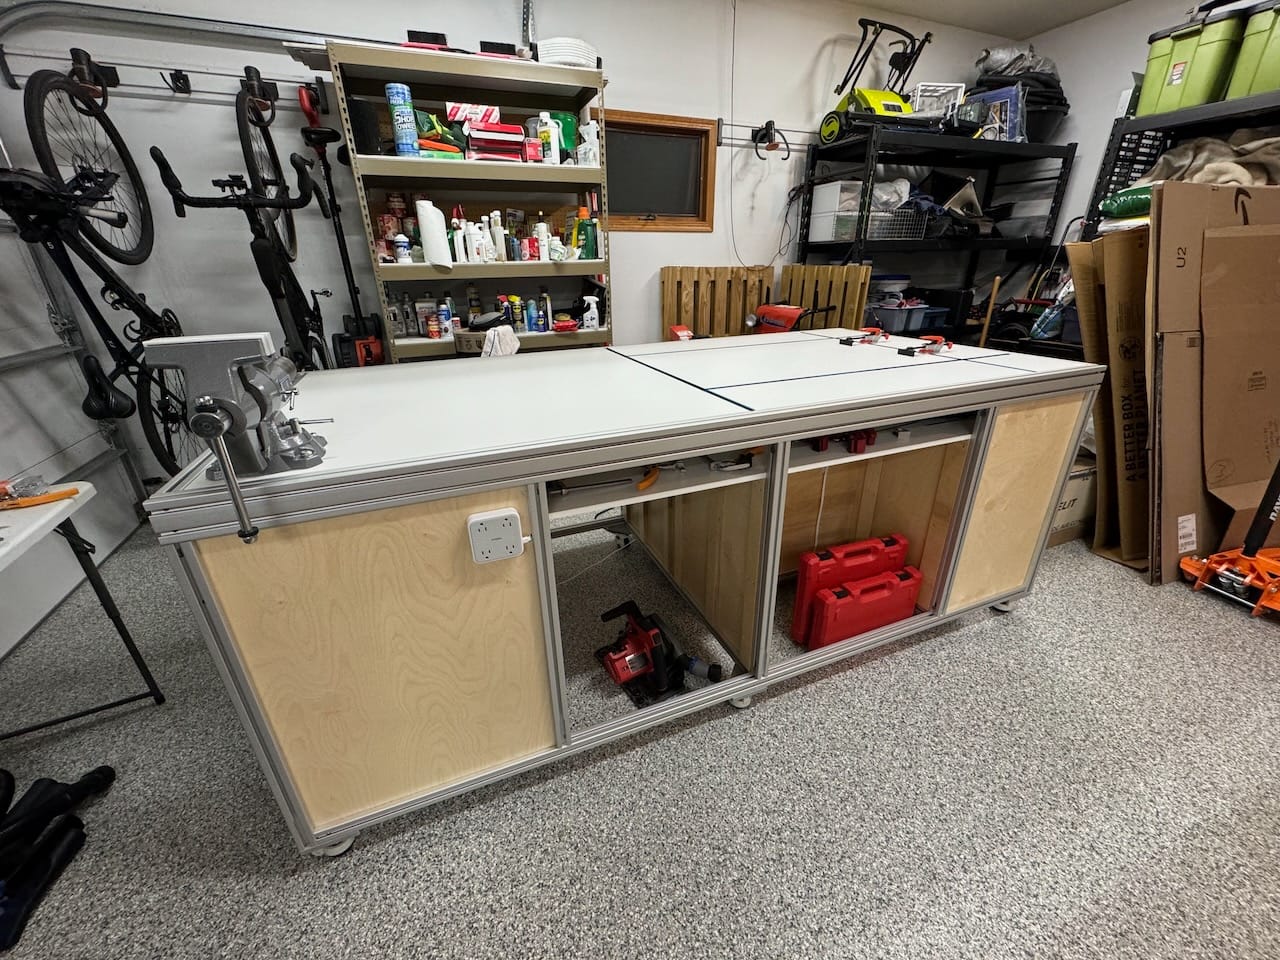
The bench is a full 4' x 8'. Some would say that's too 'deep' to reach across and they're right. But in both the garage and the basement it will be an 'island' bench so easy to walk around the full perimeter as needed. And a glorious 32 sf of horizontal project space, all at 37" height (I bumped it up an inch over typical kitchen counters for comfort).
Designed it all in SketchUp. That gave me all the exact measurements to place a laborious, long detailed order with tnutz.com for the extruded aluminum and all the various fasteners (8020 competitor at half the cost).
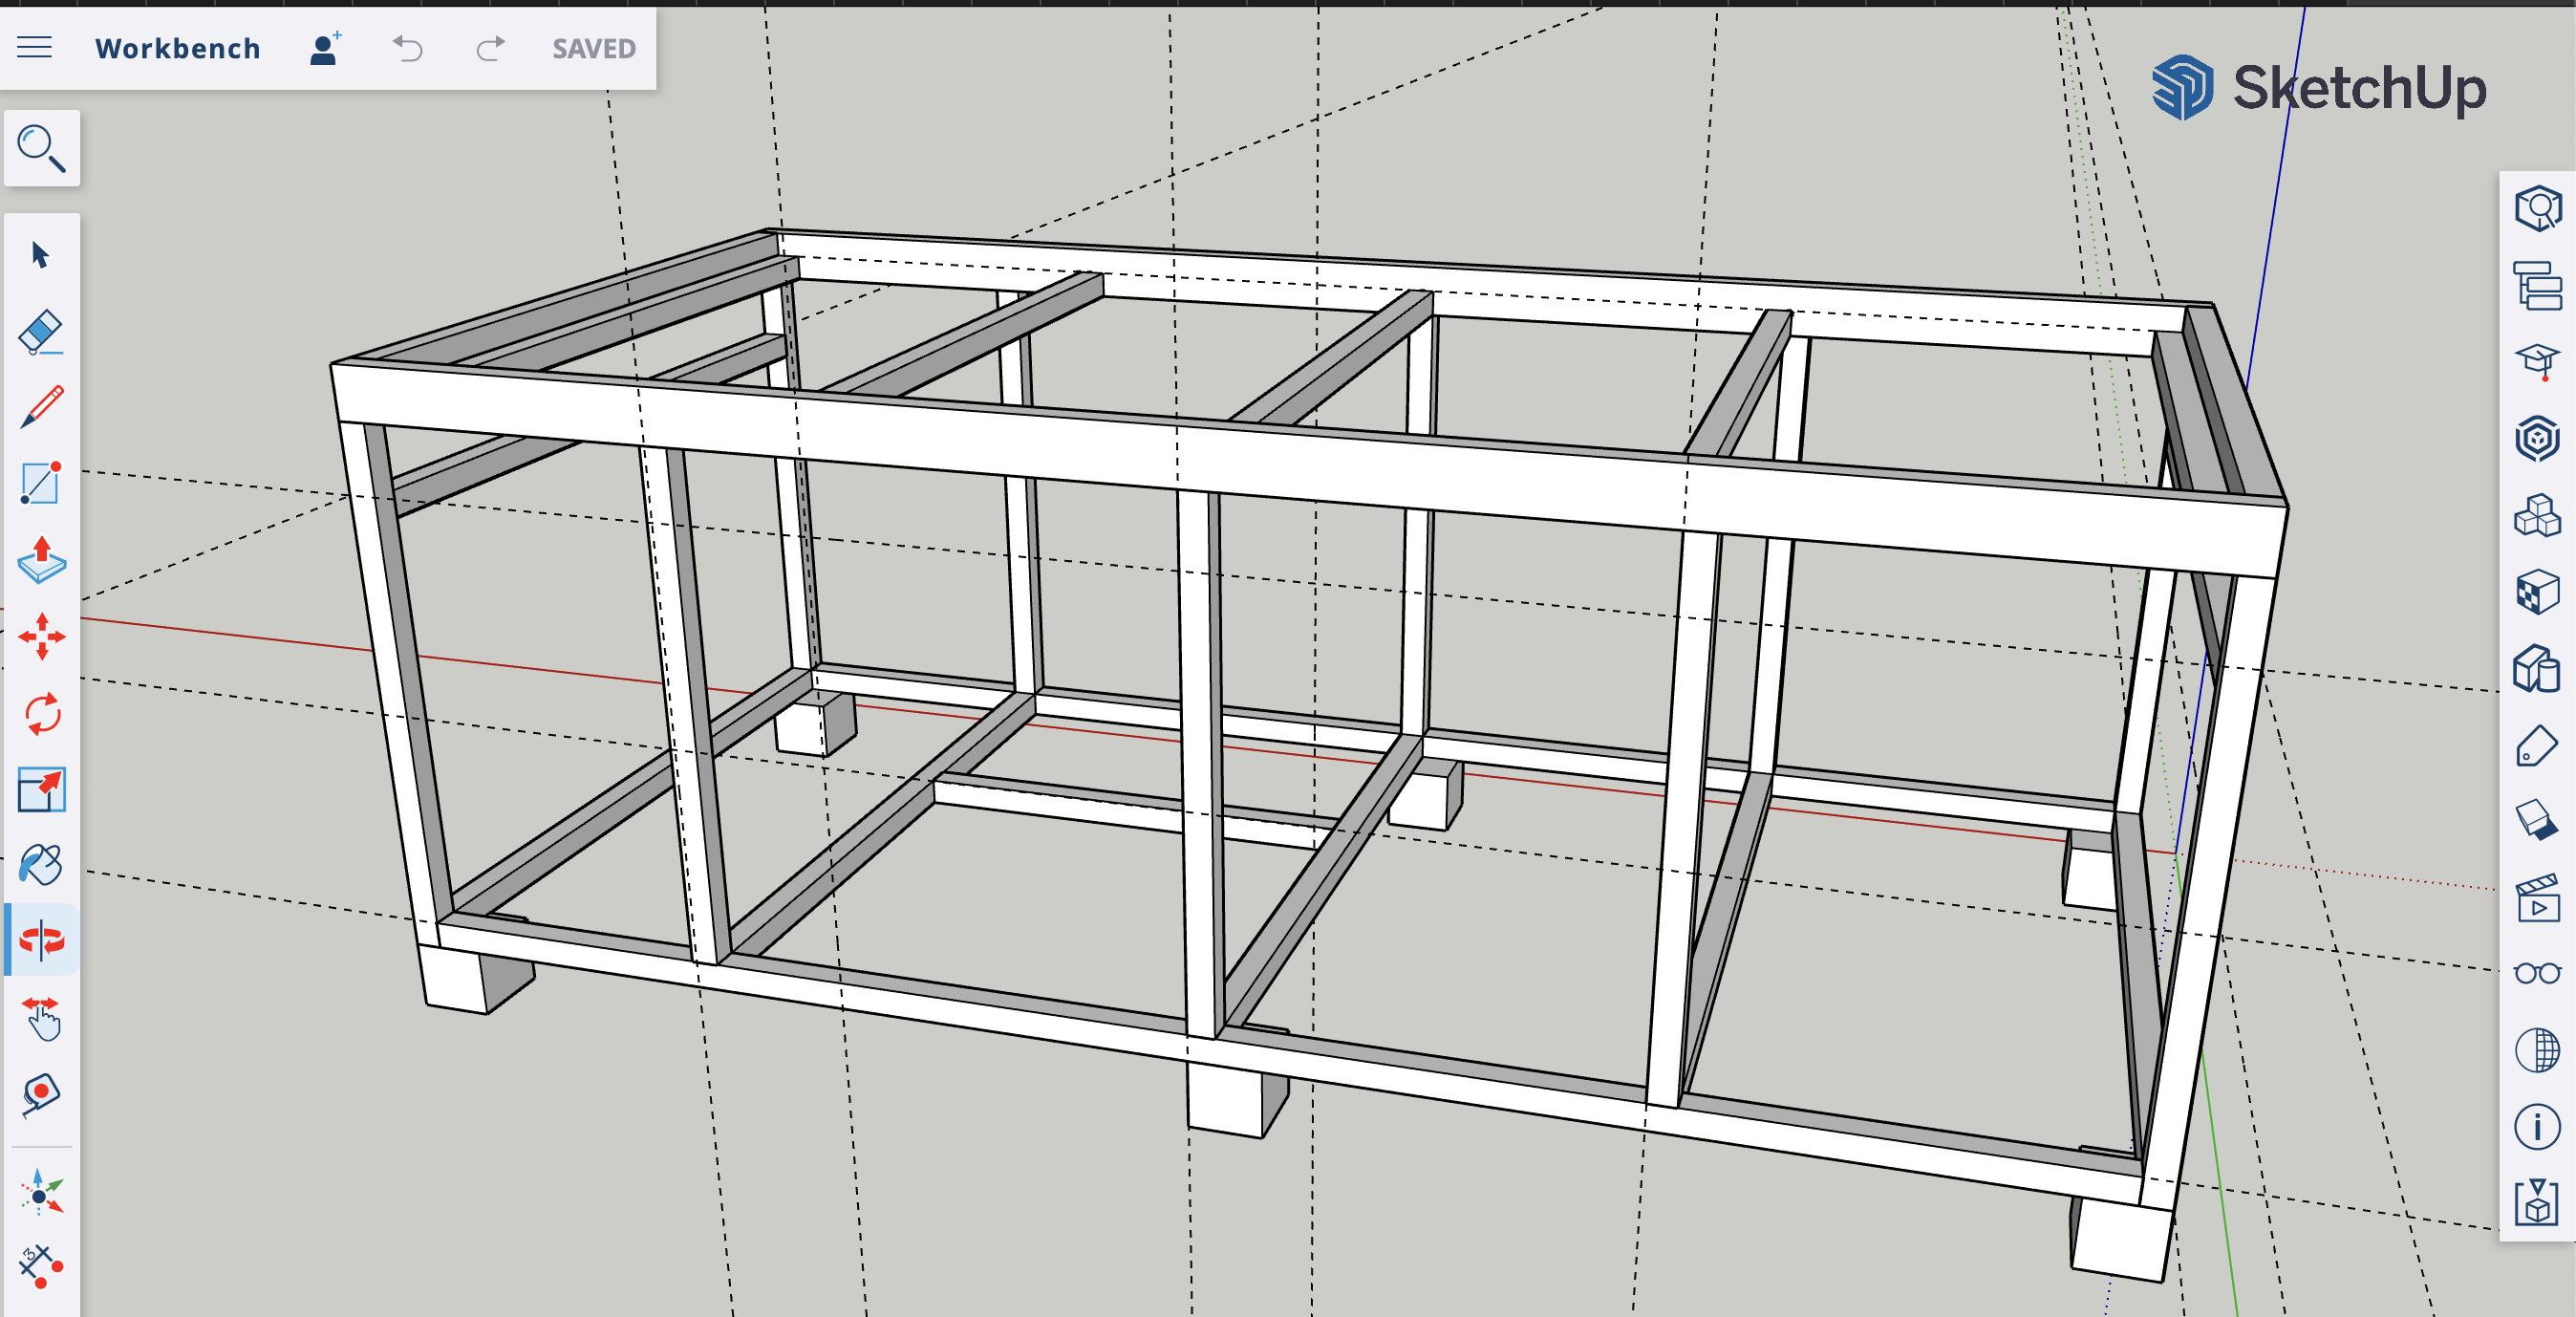
My needs are different that the BF/MFT guy (I'm much less of a woodworker so don't need the MFT clamping at this stage). Decided to go with a simple melamine mdf top. White so you can see anything on it; don't care if it gets scratched or 'dirty' vs. a black top. At $40 for the top, I can just replace it someday if it gets worn out.
Two last minute design changes turned out golden:
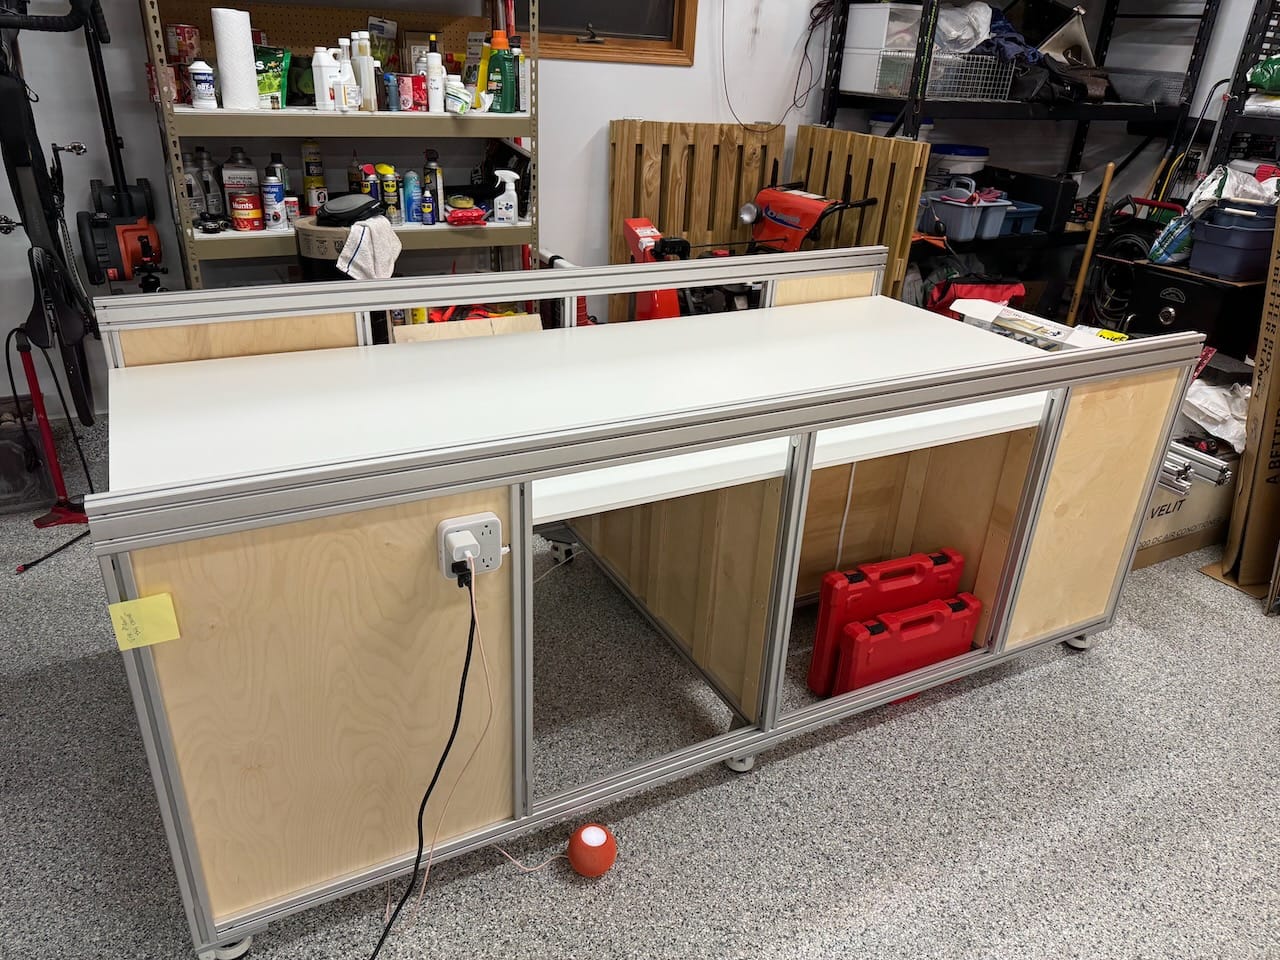
- Instead of overlaying the melamine mdf on top of the 8020, inset the top so there is a full, horizontal perimeter of 8020. That's 360 degrees of easy clamping around the full bench - in addition to the vertical clamping options all the way around also. Plus an 8020 edge will be far more durable and a perfect straight edge vs the mdf over time.
- Add a full "pan" under the top. The BF/MFT guy needs the pan because the MFT clamping holes drop all sorts of debris down inside the bench and the clamps require a hand on the underside sometimes. I don't need any of that, BUT I do have two really long 55" track saw guides. I wanted to easily slide them under the top somewhere for storage. But the more I thought about it, I have tons of stuff that is long and awkward and handy to just slide under the top (squares, long straight edges, long levels, clamps, long scrap pieces, etc.). All the stuff you have shoved vertically in the corner of your existing shop. By adding a full pan that is 4.5" below the top, I have TWICE AS MUCH horizontal space to put stuff. It's like having two gigantic workbenches instead of one for these items. And if I ever do want to convert the top (or half the top) to MFT, I have the functional pan that would be needed for it.
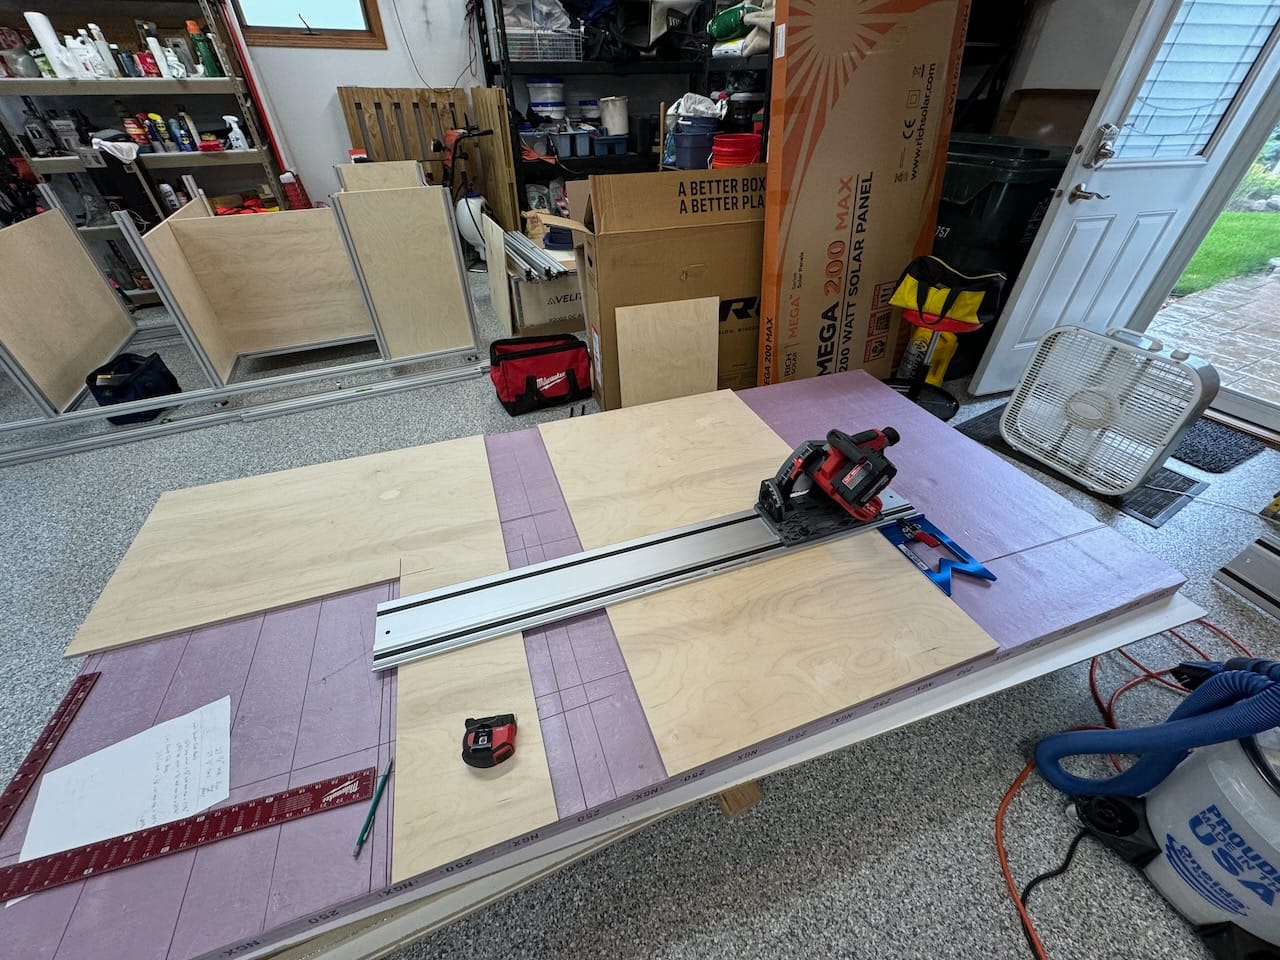
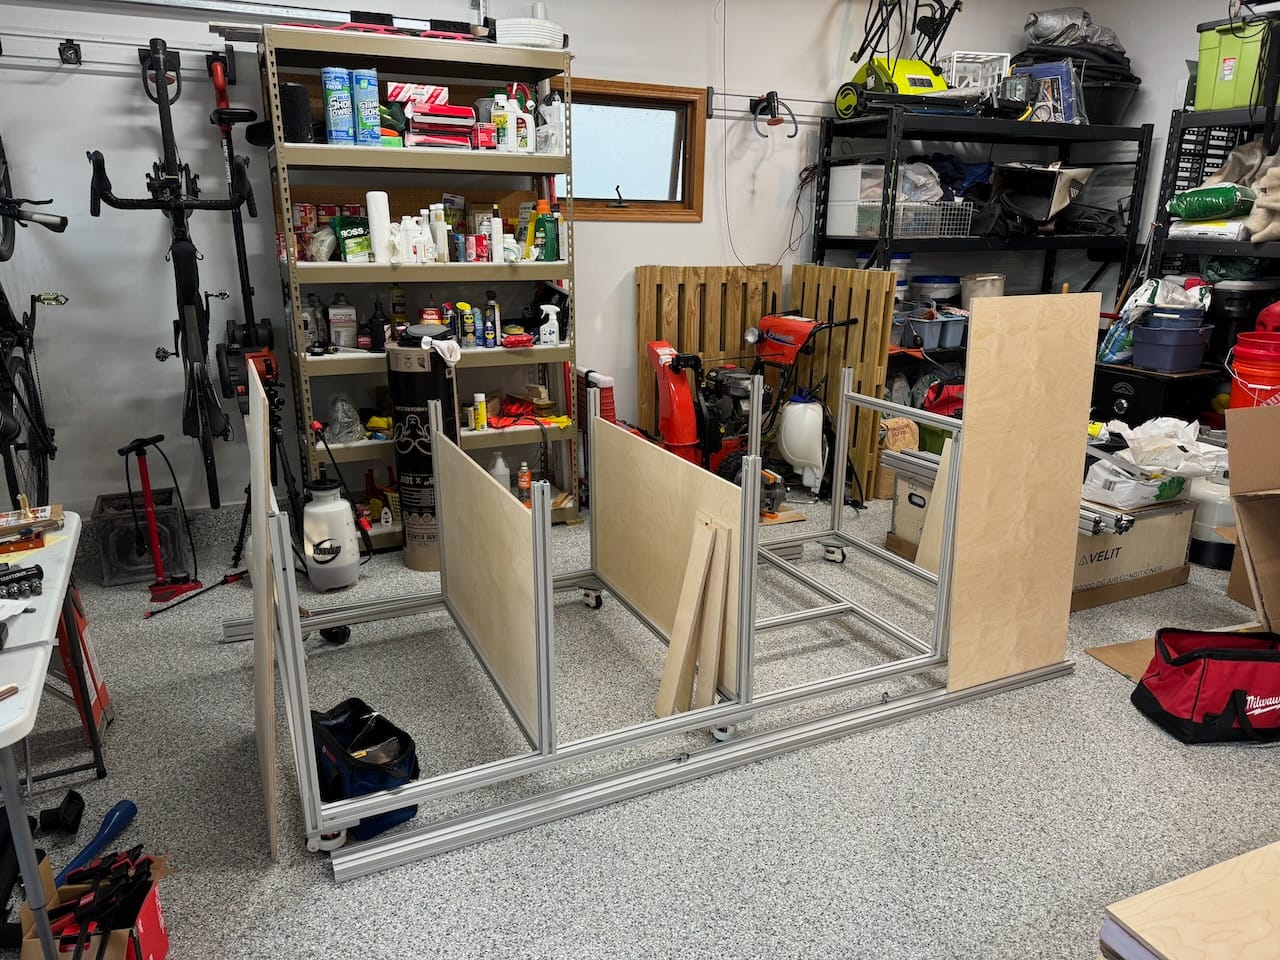
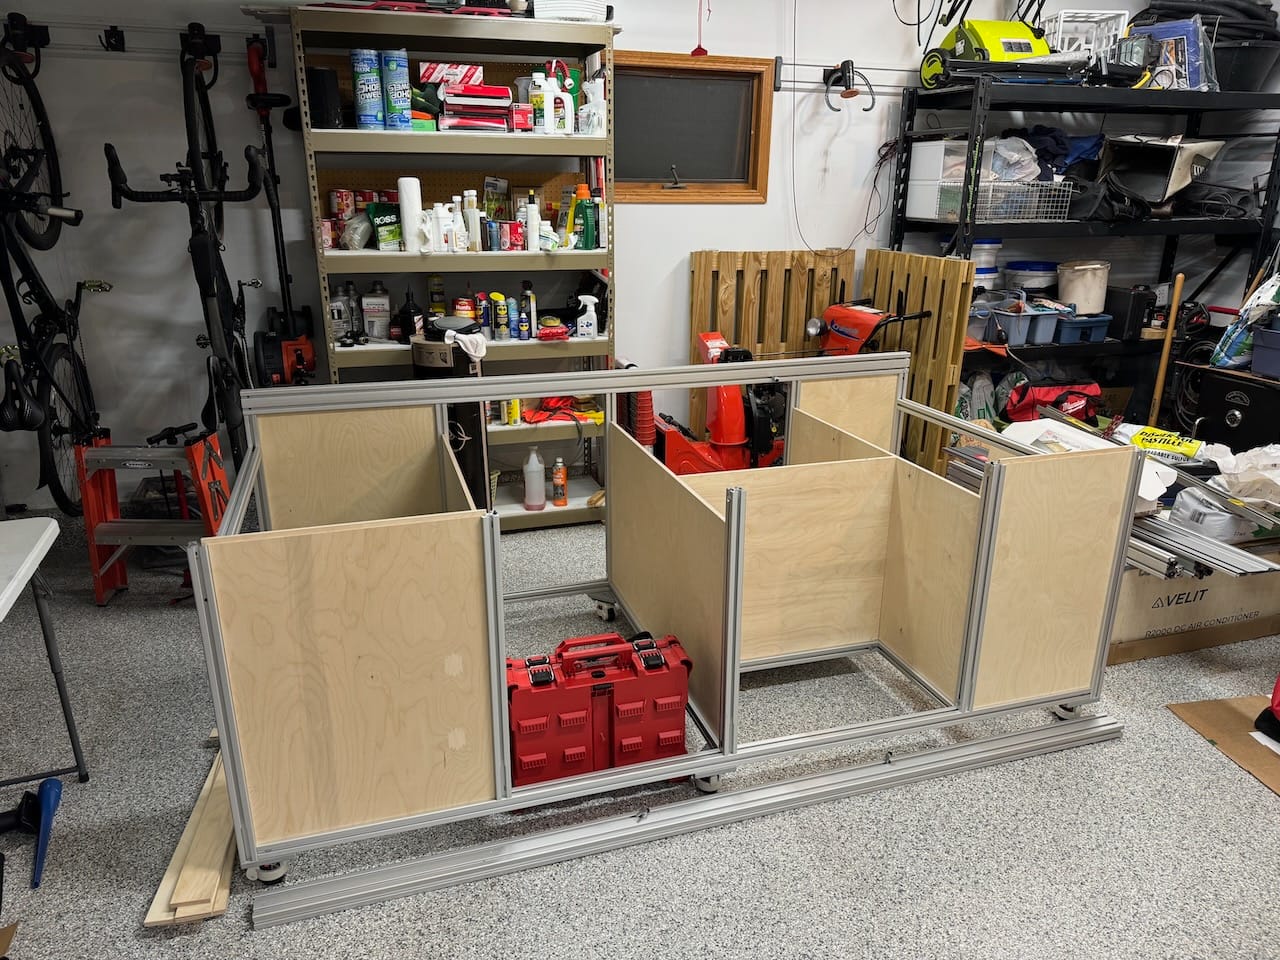
Bought a big pile of Baltic Birch plywood for the bench and the van. Routered the 1/2" plywood panels so that they fit into the slots of the 8020 perfectly.
Put the whole thing on heavy duty, 550 lb leveling casters so I can roll it around and level it on both the garage and basement floors (neither of which are ever perfectly level).
Designed a special cabinet that perfectly fits a rigid shop vac + cyclone dust collector with a long rockler hose that has tons of quick release mounts on most of my tools. No more tripping around the shop vac or kicking it out of the way all the time.
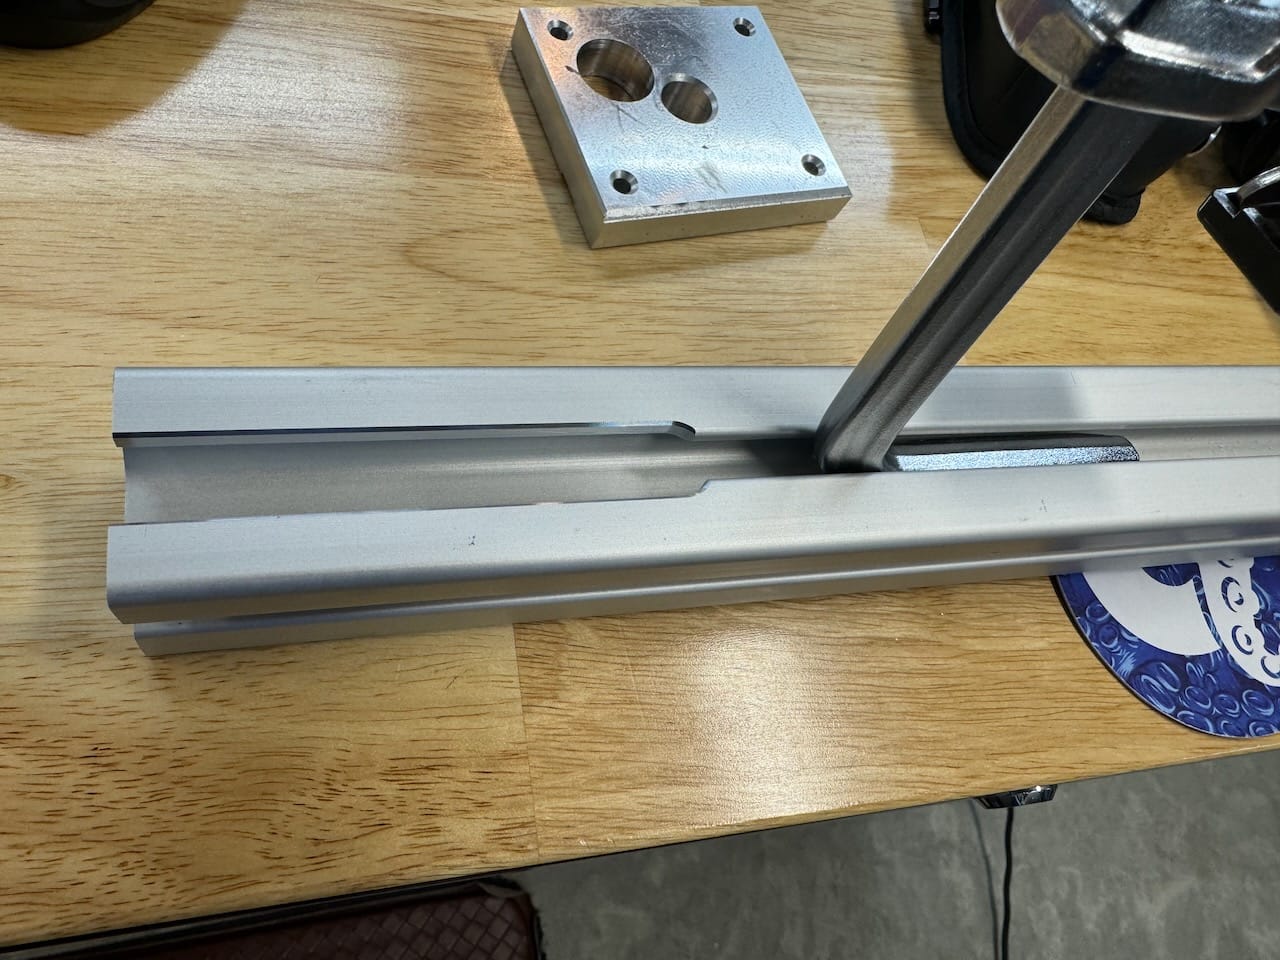
Working for Tormach, I'm lucky enough to have a small CNC mill in the basement and used it to perfectly widen the slot in the extruded aluminum so that you can slip a clamp into it, even if the end of that aluminum piece is closed off by a cross member.
On half the top, I added T-Track for even more clamping assembly options. That's the blue stuff I routered channels into the melamine mdf for. This required enough depth that I ended up using TWO 3/4" melamine mdf sheets for the top. The top is 1.5" thick so the T-Track has plenty of holding retention.
After weeks of work, also decided to add my first really nice vise - a Wilton 550P 5 1/2" 360 rotating head vise. For the last 30 years I struggled with a crappy 'clamp on to the table' $5 Harbor Freight special.
The final result is still missing the drawers and sliding trays, but otherwise functional with electrical outlets. I bought all the drawer glides and pre-mounted on the panels all the supports I need before adding the top (much easier). I can finish the drawers in late winter; the van needs to finish before the snow flies!
Member discussion