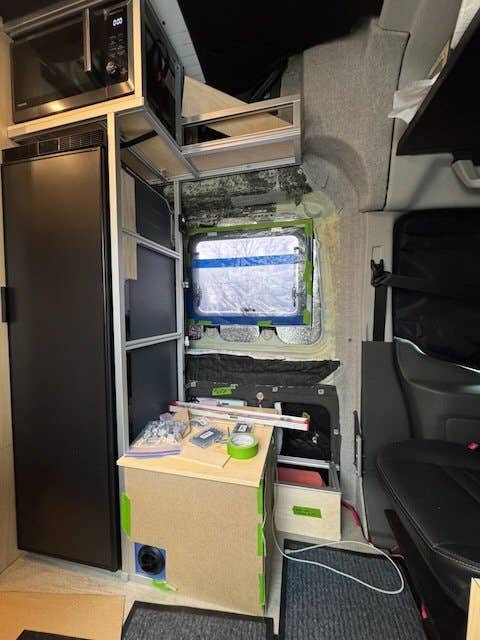
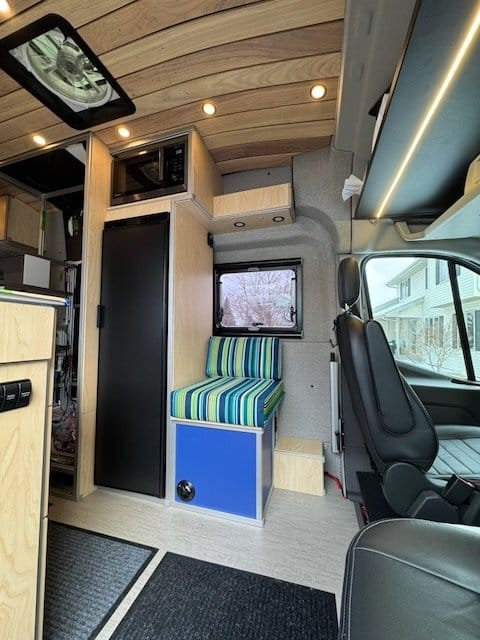
Fridge, Microwave, Bench, Front Window Trim
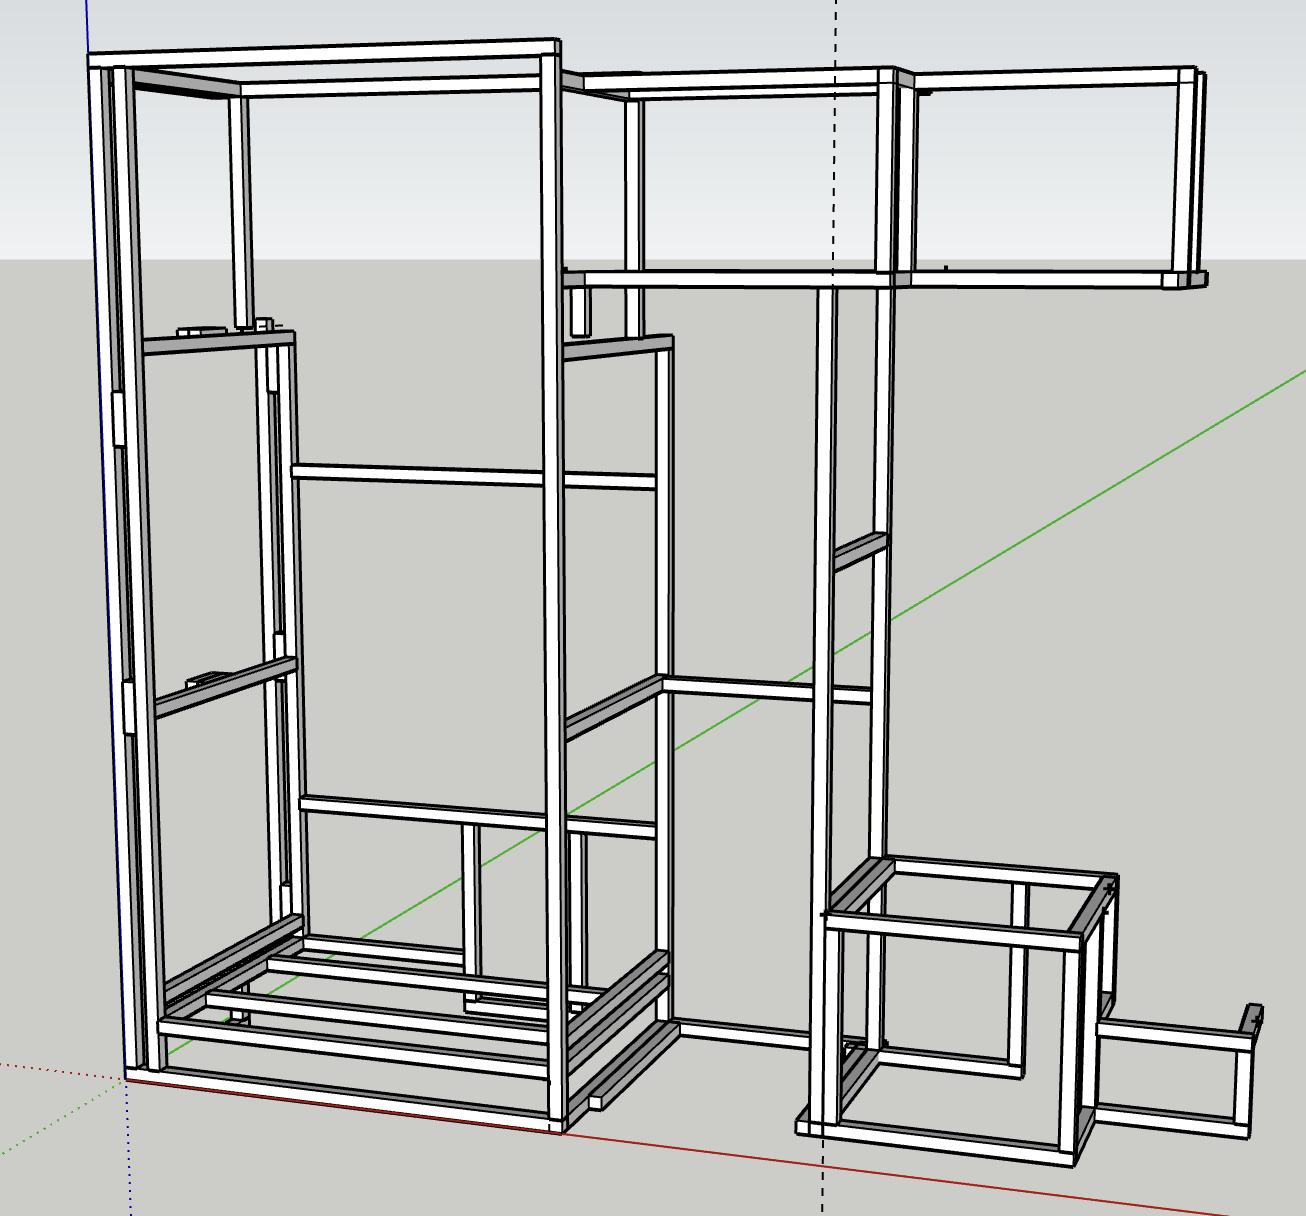
The 8020 framing for all of the above is all designed together. The bench could be removed without tearing into the fridge cavity - same for the heater. But overall a lot of interdependencies for securely attaching all of this weight to the van. The starting point was the image above in Sketchup - a 3D CAD package.
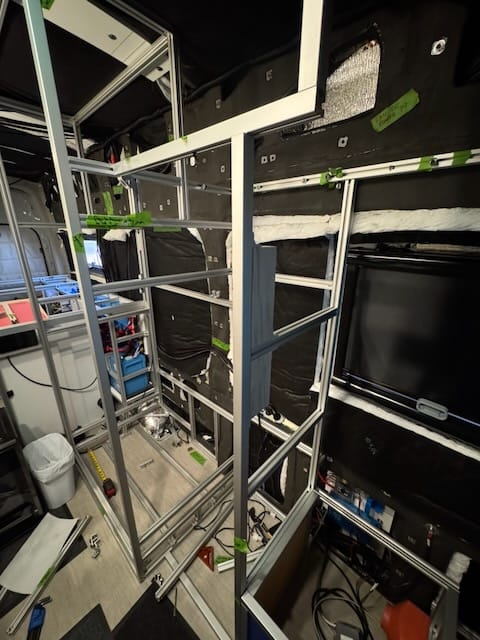
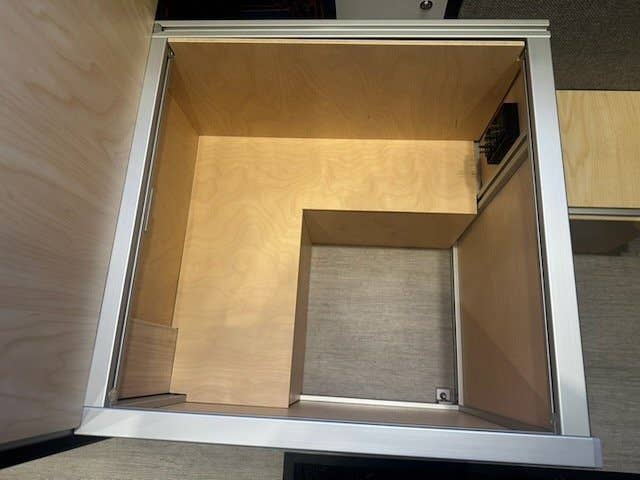
Below is the rough framing starting to take shape. Added some poplar hardwood blocking in several areas so that fridge mounting screws had somewhere to land. Oversized the blocks just in case the fridge prematurely dies and we have to change to the second brand of fridges that still fits in the same opening.
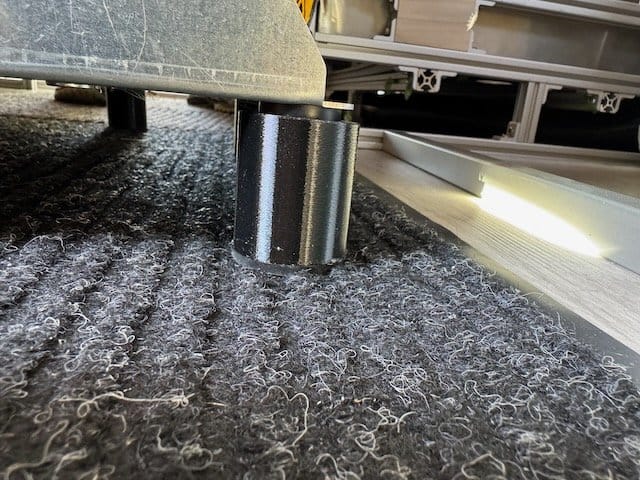
3D printed some riser feet for the fridge. The existing fridge feet fit inside the top of the 3D part perfectly and then they add another 1" of height to encourage airflow and make access easier for any spills/drips/condensation.
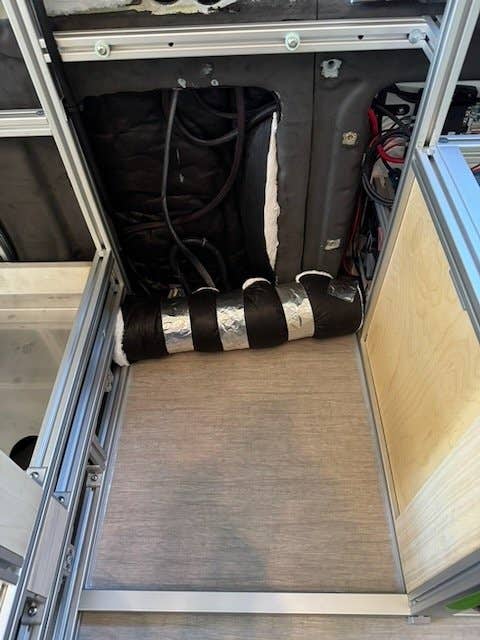
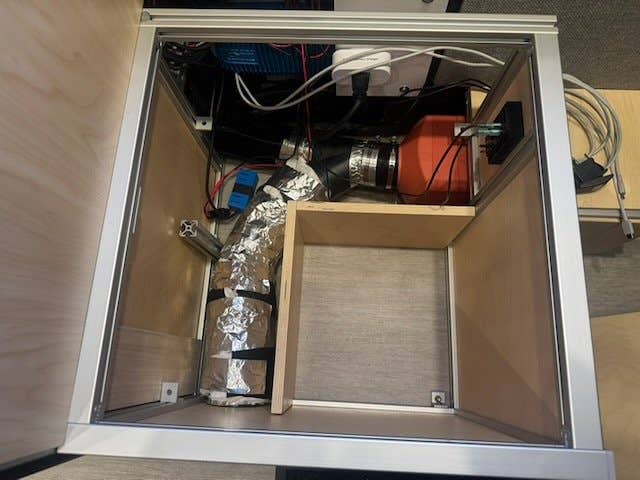
Then sealed the 8020 'box' under the fridge with a bead of silicone on the inside perimeter. If water does drop down, I want it contained and not running under the 8020 to under the shower pan or other places impossible to wipe up. Also insulated the heater ducting as it runs to the back of the van behind the fridge and under the shower pan.
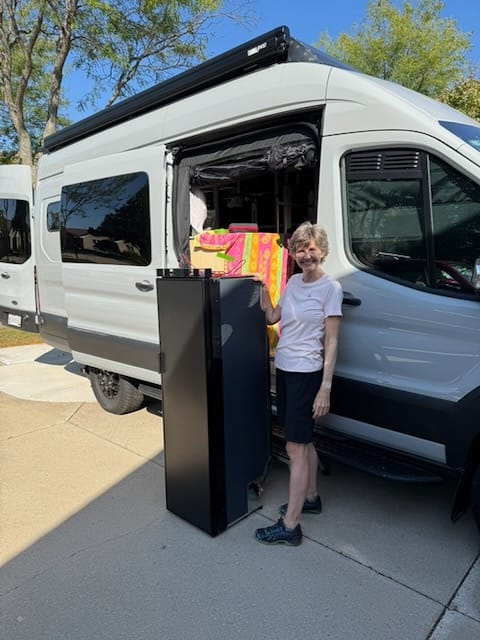
Fridge move in day is always exciting. Starting to feel a bit more like an adventure camper.
Starting to work on trimming out the final Arctic Tern window. You can also see the shelf above the fridge for the microwave/convection oven/air fryer/do everything unit.
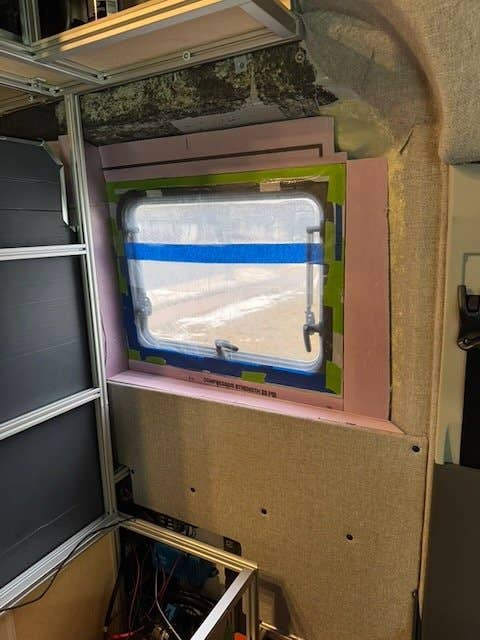
XPS pink foam and lower upholstered wall panel coming into the picture. Tons of crazy angles and shaving here and there to align with van walls and warts.
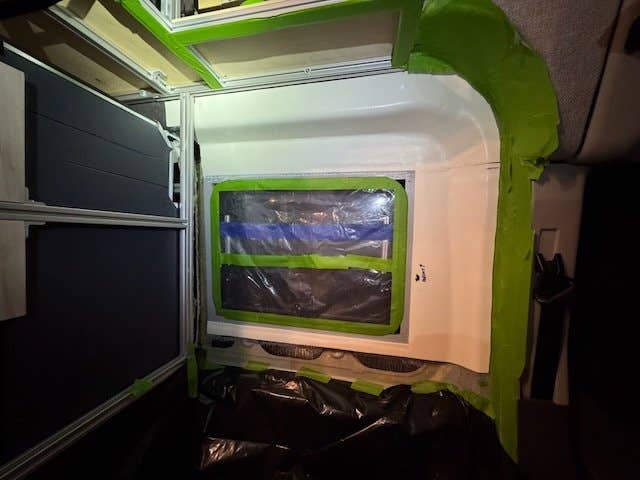
Landau foam mops up lots of sins - and adds a wee bit of insulation.
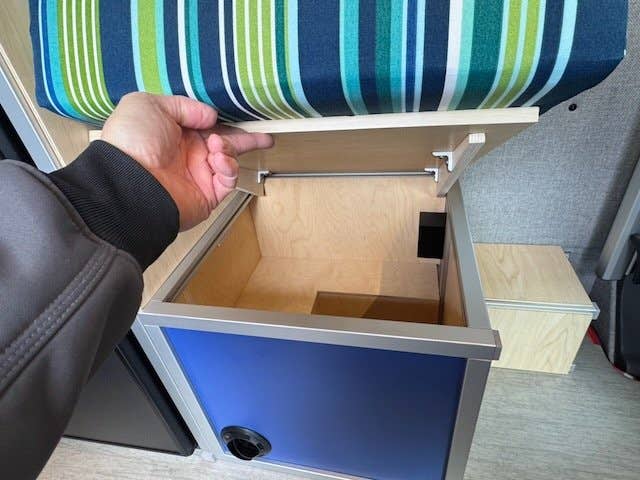
The little bench seat hides some of the Velit heater, ducting, and the front small electrical panel, starter battery charger. There's an ESP32 mini controlled Noctua 12V fan tucked in there on the left side. When all done, it draws air in around the outside of the heater, its turret heat sink, and out through the fridge cavity.
Final result came out well I think.
Wonderful neighbor across the street is a sewing wizard and the pop of color is fun. You can also see the last minute addition of a dimmable LED strip to the underside of the shelf above the driver and passenger seats.
Tucked a little switch bank on the side of the bench. Switches are for bench lights, overhead shelf led strip, and the onboard air compressor. Easy access while driving with my left hand so I can top off the tank 5 min before arriving at the night's destination. That way tweaking the level with the air bags doesn't cycle the slightly noisy compressor.
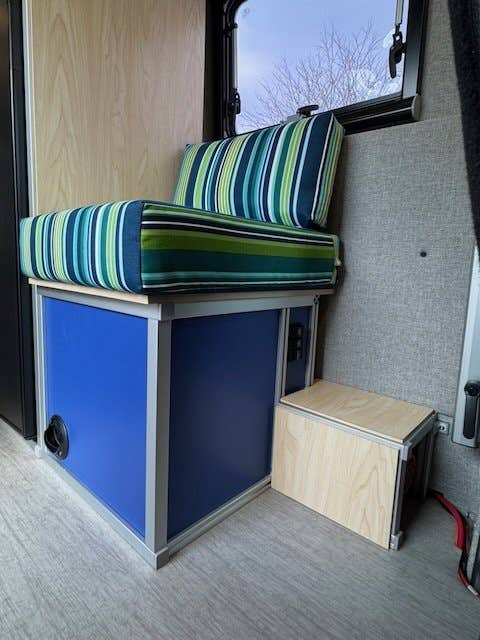
Was going to use a piano hinge on the bench seat, but decided to try some perfect fit simple rails instead. This lets me easily tip up the seat for quick access to shoes, the Dyson, etc. I can also just grab the whole seat and lift it off which makes cleaning way easier. And this provides better + faster access to the electronics and the furnace if needed.
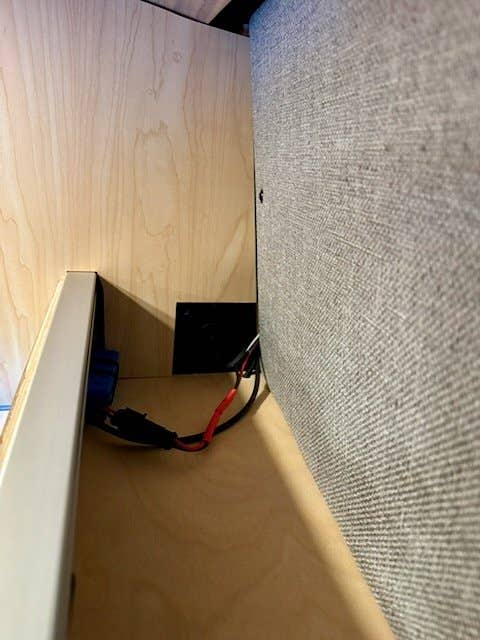
Hidden in the shelf above the bench is another ESP32 controlled Noctua 12V fan. This provides better cooling when using the convection or air fryer modes of the oven. I ran it a bunch in various modes and used a heat gun on it to find the hot spots. Added a bit of aluminum tape to keep heat transfer down to the back wall of the cabinet area. The leads and ESP32 box are temporarily hanging out there (found a few times I've had to power cycle the ESP32 manually and having access to the box vs. buried in the wall behind the panel makes that far easier).
Member discussion