Electrical System - Part 3
Now comes the disappointment of trying to fit "the small stuff" fully into the cabinet. I really only focused on where the 3 heavy batteries and the large, heavy Multiplus inverter would live and assumed I'd figure out the rest later with the 'acres of space' leftover. Yeah right.
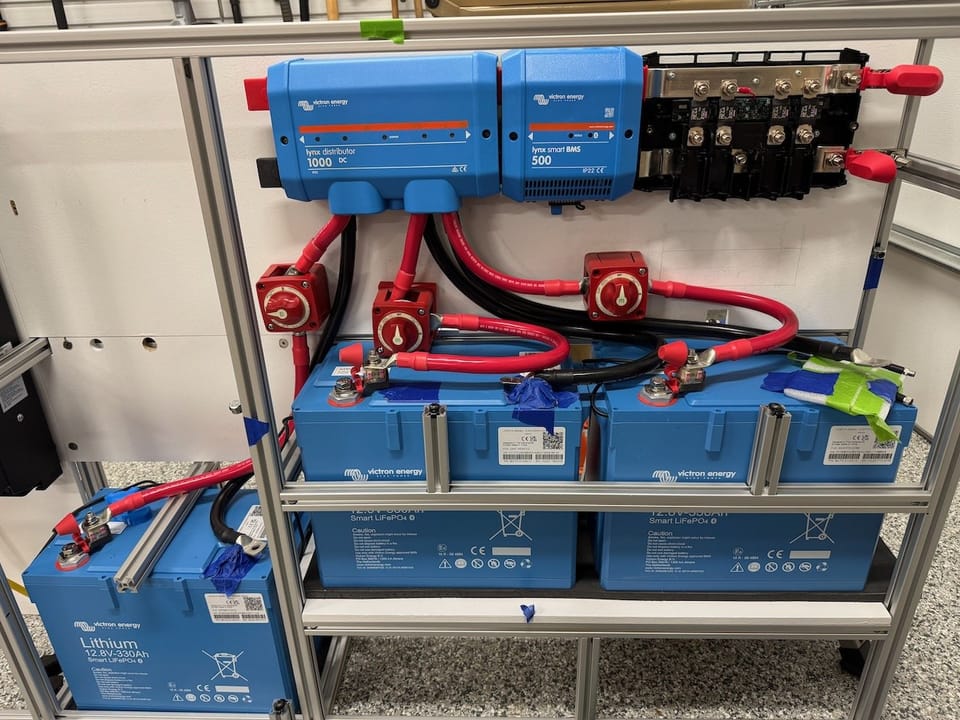
The back panel of the cabinet is 1/2" Baltic Birch. 3 batteries and 3 battery cutoff switches, all with giant thick AWG 4/0 cable that must be the same length for every battery is a huge layout problem. And given how pricey Ancor 4/0 cabling is, I sure don't want to waste any. Bought a cheap vinyl, stiff garden hose that I could cut up and use as a stand-in for testing bending radius and routing while trying to solve it.
Picture above shows I had to get creative with the orientation of the cutoff switches and needed to 3D print a 'spacer block' behind one of the cutoff switches to make all the cable routing work (its the middle switch that has the red spacer block behind it).
Once that rats nest was solved, on to laying out the rest of the panel. One of ~12 variations I was messing with below.

After some research I resolved to routing much of my wiring BEHIND the back panel. No possible way I could get all the AWG 4/0 stuff from the far right way back to the Multiplus and chassis ground on the left with wires on the front side of the panel - would be a giant mess.
Planned extensively for exactly where I needed cable access holes, how big, how much bend radius, etc. Then you drill and install back side T-Nuts to over 120 holes. Better hope they're in the right spot.
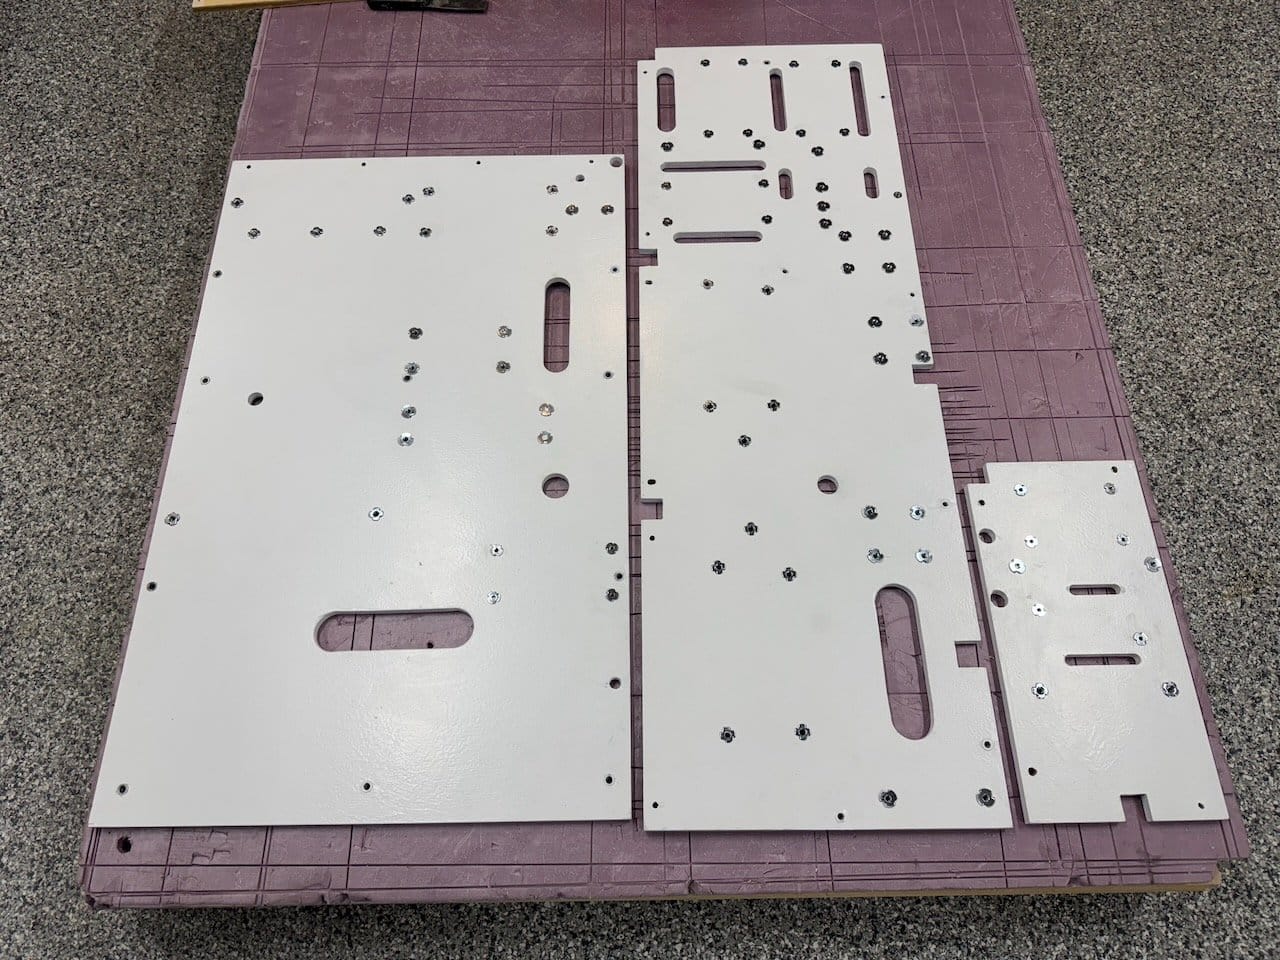
Wood screws might work, but these things have to be serviceable - bolt/unbolt them easily from the panel without the holes getting 'lose'. And the 42 lb Multiplus needs solid attachment. There's no way a t-nut will get pulled through the panel; the bolt will strip first. I wasn't confident threaded inserts wouldn't pull out on a good bounce (and they're not any easier or cheaper to put in at this stage).
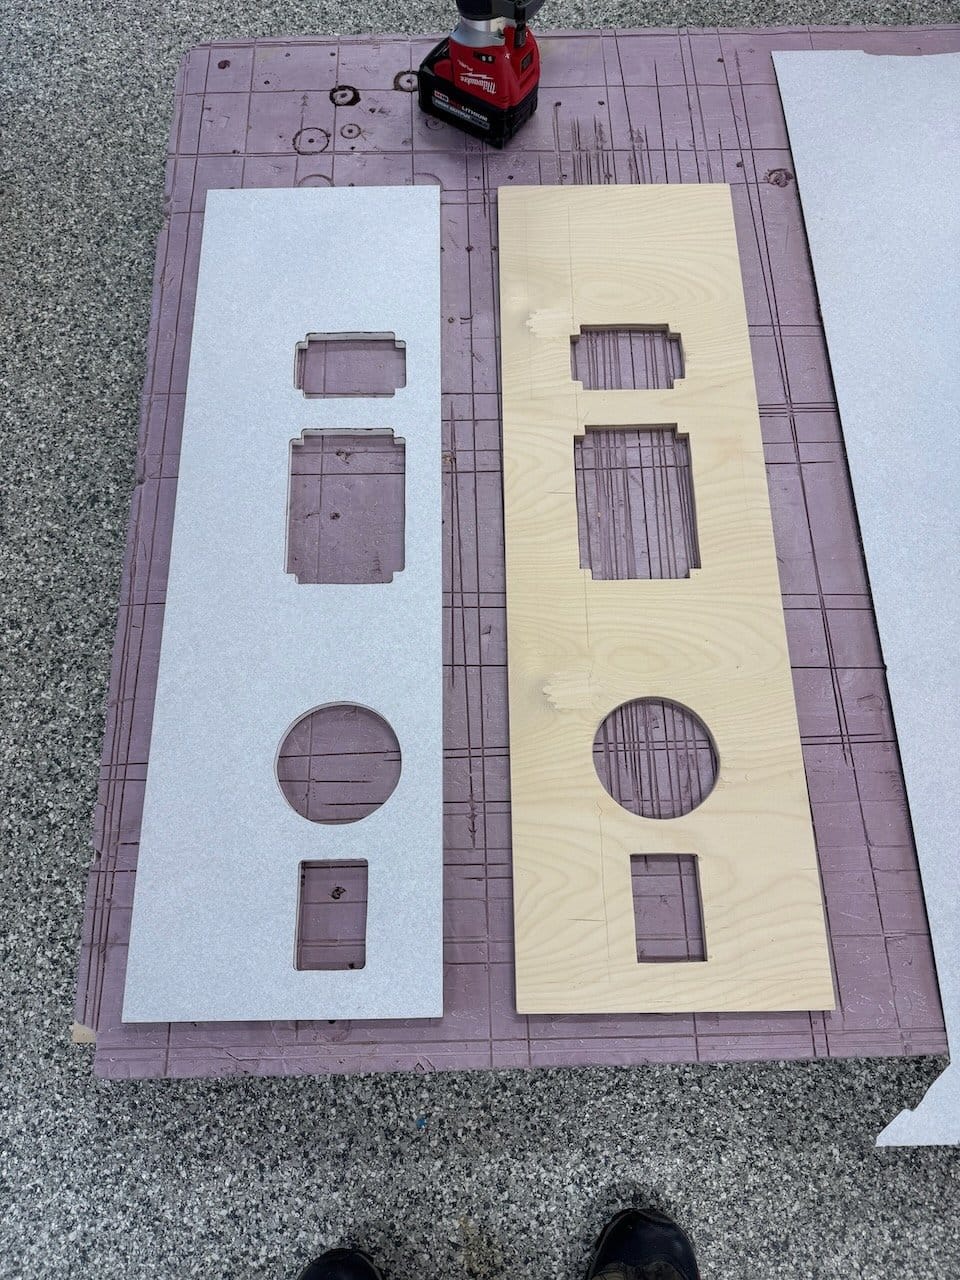
Ah yes, the rear panel facing the rear doors. That's where all my AC circuit breaker switches are and an active cabinet ventilation fan. Need to fabricate that and laminate it.
And discover that centering the items in the panel will drive you nuts in the future because they won't appear centered from the rear of the van. Because about 3" or more of the cabinet is hidden by the rear door threshold. Sigh. Make another panel and be thankful you discovered this before laminating.
V1 on the right, the correct V2 on the left.
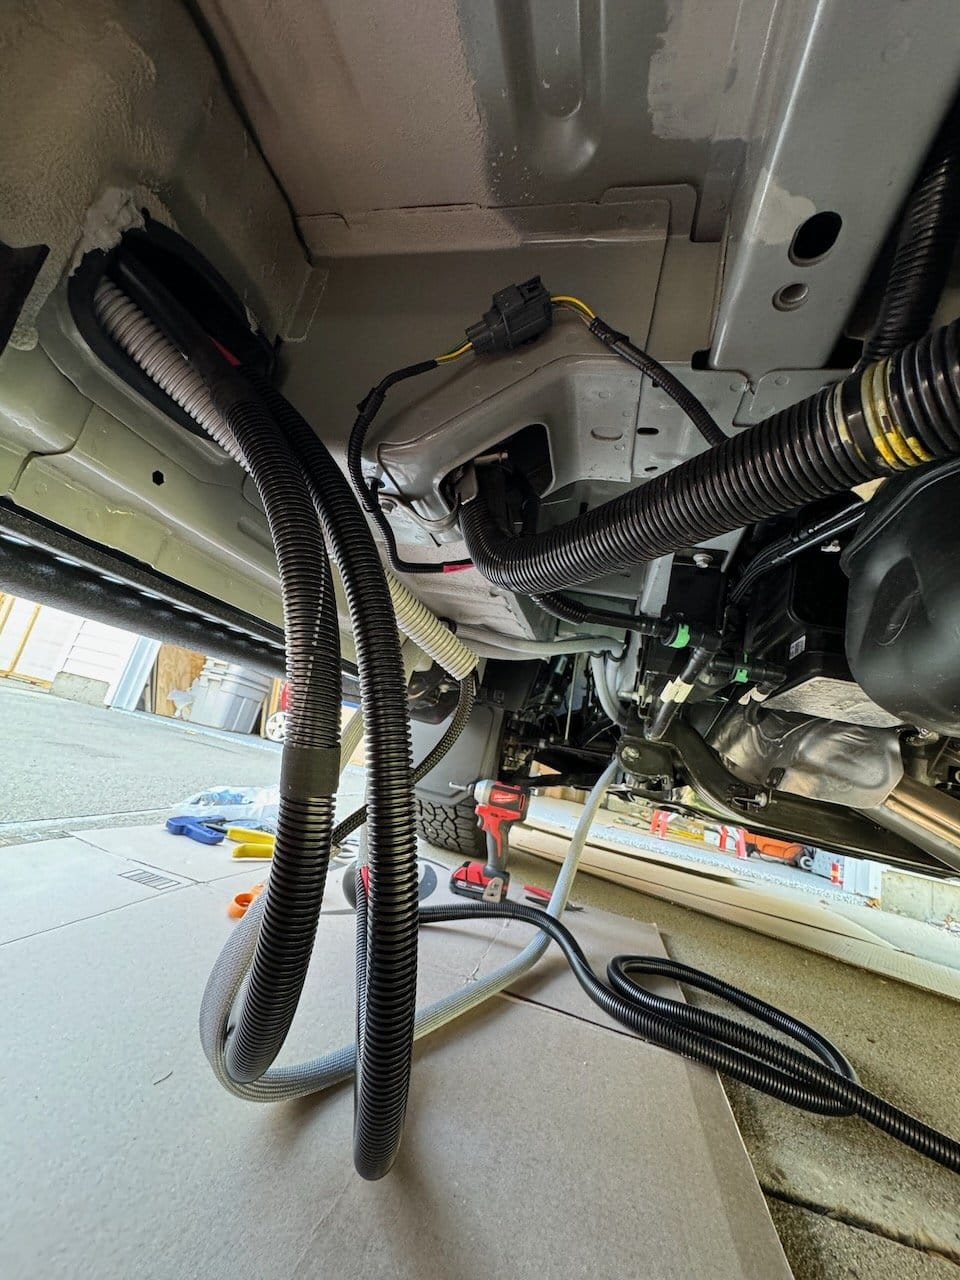
I skipped the gory details of stringing heavy Ancor AWG 4/0 cabling all the way from the alternator, across the engine bay, up to the interior through the wall interstitial behind the driver, and then back to the electrical cabinet area.
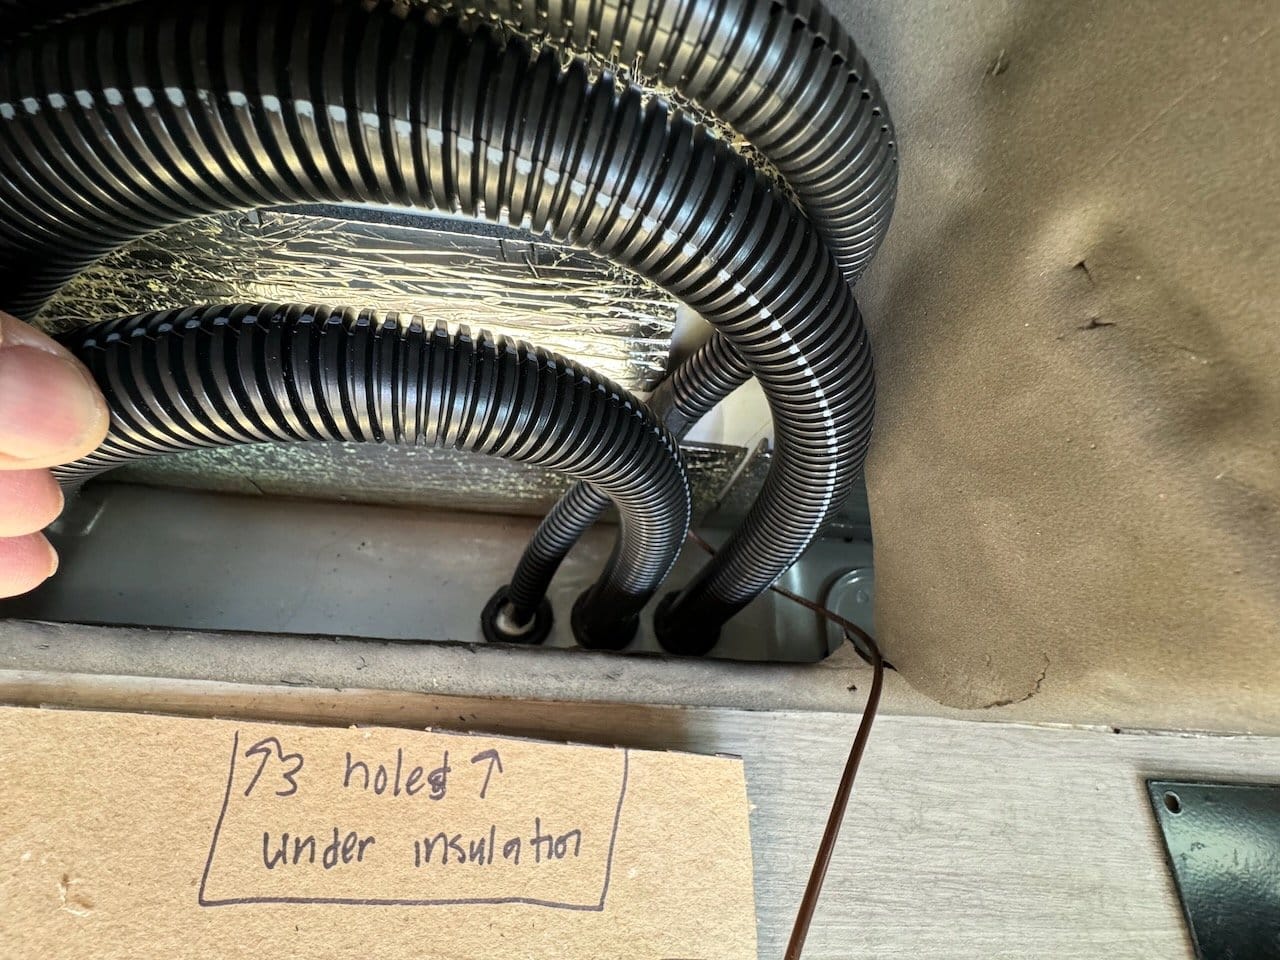
I bought 50 foot rolls of Ancor AWG 4/0 and used it all. And it needs to be put inside either heat shielding wire wrap or plastic conduit for some protection.
Member discussion